Inlägg

Visar inlägg med etiketten Tutorial

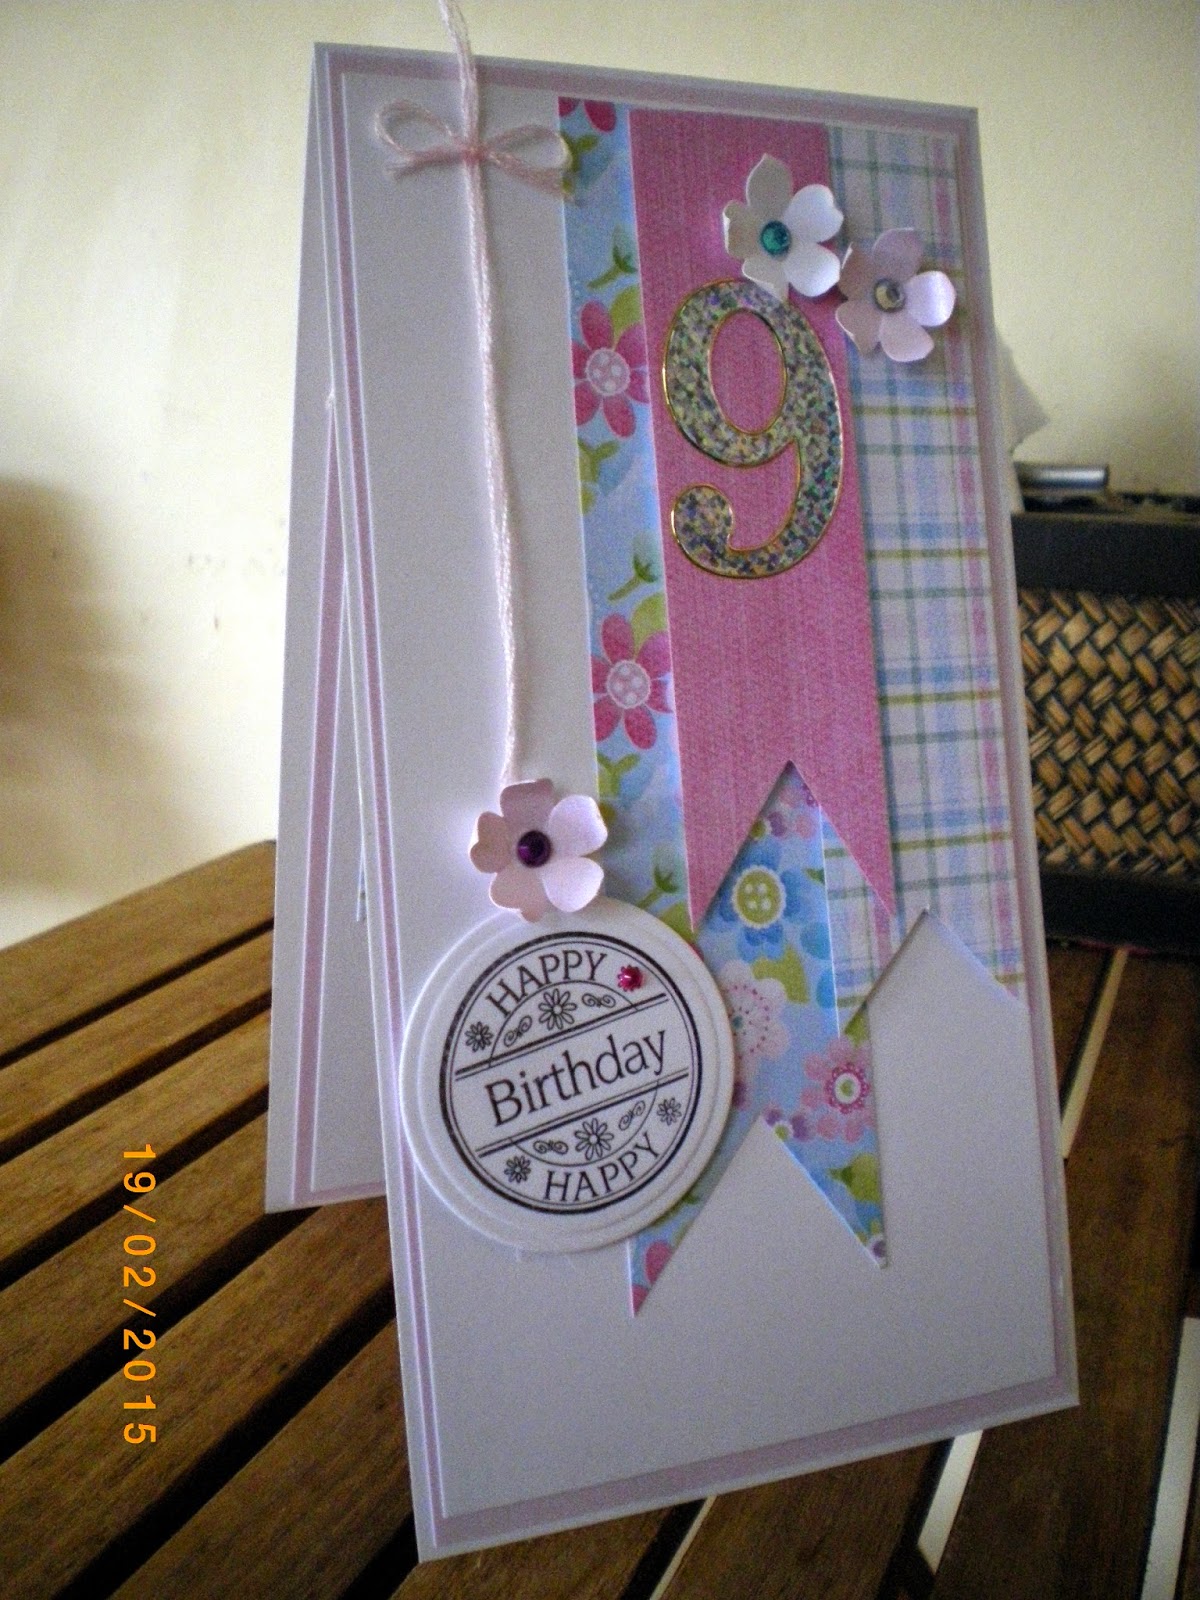
Birthdaycard tutorial for my Granddaughter Tuva
Bild
Hi there, This beautiful #birthday card is for my granddaughter Tuva, and today is her 9th birthday!  Here is the tutorial for the card: I have cut out from white cardstock 20x10,5cm for the front and 21x10,5cm for the back. Score the top on 1 cm on the back pice, fold it and put some doublesided tape on the folded part. Cut a smaller panel of colored cardstock and a even smaller piece of white cardstock, make 2 set of this, one for inside of the card and one for the front. Married the 2 pieces together. Decorate the front panel as you pleased and glue it on the white front panel. Decorate the inside and remember to make it flat, and glue this on the white back pice. Put the front and the back together and you have a hinge card. Happy Creating:) Anki J

Ribbon spool Tutorial

Bild
Hi there, todays #tutorial is a #Ribbon-Spool, and how on earth did I get that idea, well I order a lot of ribbons from Ebay and AlibabaExpress and some times they are not on a spool. I store them on a Receip Keeper.  So that's my story. I'm also very lucky to have a #Silhouette Cameo. *You need a empty paper roll. *Heavy cardstock. (I use 285gsm) *Doubblesided tape. *Scotch Maximum Strengt Adhesive or similar. I cut the paper roll on the length, so I get it flat, measured it to the same size as the ribbon that it is supposed to store, and add 2-3mm so I'm shore it's fit the ribbon. I Cut it streight with my Fiskars papercutter. Cut of a small pice on the short end about 1-2 cm, depend on how much ribbon you need to have on your finished spool. Put some double sided tape inside one of the ends and outside on the opposite side, Put them together. I did cut out 6 round pices of heavy cardstock 285gsm for 3 spools on my Cameo, this you also can do with

New Video #Tutorial - Tealigth Card

Bild
Hi there, and hope that you had a great Christmas! Today is my new tutorial video finished and here is the final result of the Tealigth Card.  Front of the card And inside of the card, lots of space for a message to the reciver. Layout for the card. Happy Creating;) Anki J

A small box for Big #Tealights

Bild
Hi there, Yes I did it!!  My first video for Youtube is finished, and you can see the result here. For this video you need: 1 cardstock 10" x 5 7/8 " 1 piece decorpaper/cardstock 2 1/8 " x 2 1/8 " for the top of the Box. 4 pieces decorpaper/cardstock 2 1/8 " x 1, 5 " for the sides of the Box. 2 small cardstock of your choice, for the dies, #Spellbinders Dies Nestabilities "Lacey Circles" S4-293 and "Standard Circles Large" S4-114. Round stamp of your choice, and a small piece of paper/cardstock to stamp on. Hope that you enyojed as much as I did, next time will be a better video, still learning. Happy Creation;) Anki J

#Tutorial #ExplodingBox

Bild
Hi there, it's still very hot here in Thailand for the season around +34C every day, phuuu, like it better when it is around +28C. Today I going to share a tutorial of a Exploding Box. In the end of this tutorial you have a video how to do! 2 cardstock 12x12 " Bottom and Lid. Here you can see the measure and the marks to score the box bottom.  To score the diagonal corners I use a ruler and the stylus on my Magnetic Cutting Mat.    I mark the 4 corner in heart shape and cut it out.  Fold the heart shaped corner Distress all edges and scorings, both inside and outside.  Stamp your message inside the box. I used a christmas stamp from my "stash"   I cut out 4 pieces 3 1/8 "x 3 1/8 " of christmas paper and glue it on the outside of the box.   Internal pocket, 1 sheet 11 3/4 "x 11 3/4", score and cut as above. i did mine in green cardstock. Cut/punch out a small piece in the middl

#ChocolateCard with Hunkydory's Essentials

Bild
Hi there, todays #Tutorial is a chocolate card, perfect to give away! I did it with papper from Hunkydory and cardstock that I bought in Tesco here in Thailand, it is 180 gsm and A4 and smells a little bit of perfume (typical thai), they also lustre a little bit.    Cut 1 cardstock in 4 7/8" x 6 3/4"  for this small Lindt chocolate bar. ( I made 2 to make another card)  Score and fold at 1 1/2" , 1 7/8" , 4 1/8" and 4 1/2"  Punch the edge of your choice on the side that you had score at 1 1/2" . Cut 2 pieces 7/8" x 2 3/8", and Score at 1" and 1 3/8" Decorate the inside of the card, I use some of my Hunkydory papper in pink, brown and gold. Glue or tape the 2 pieces of the punched side of the card  to make a pocket for the chocolate bar.  Don't forget the tiny little piece in the middle. Glue or tape the 2 ribbon on each side of the "outside" of the card.