Inlägg

Visar inlägg med etiketten Tutorial

Redigera Punkter (Noder) i Studio v3 - v4

Bild
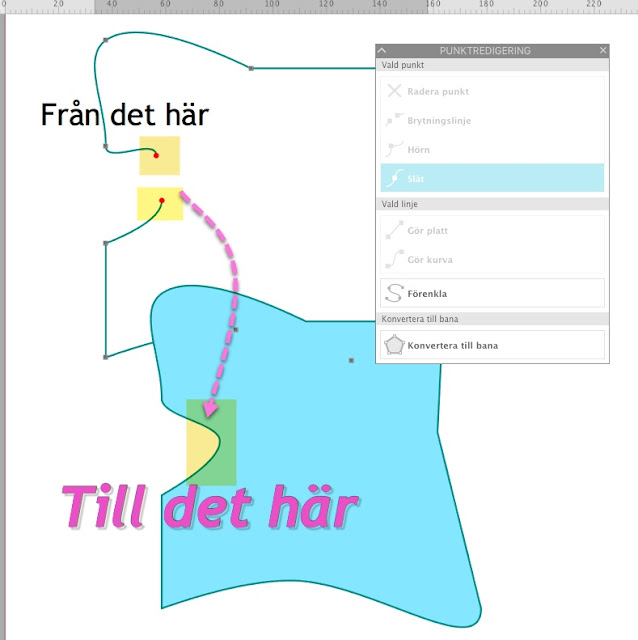
Punktredigering i Silhouette Studio v3 - v4 Härom dagen gjorde jag ett "Mermaid" mönster i Studio och stötte på ett problem som jag tror flera av er har gjort, mina "Mermaid skal" gick inte att färglägga! En kort video hur du ska se varför de inte färgläggs och hur du ska lösa problemet... Om du gillar det här blogginlägget blir jag väldigt glad om du delar det med dina Silhouette vänner!

Lägg till en Vattenstämpel i Silhouette Studio®

Bild
Hur noga man än är med att märka upp sina foton, filer och annat man skapat på internet så är en Watermark - Vattenstämpel det bästa för att inte bli bestulen i cyberrymden. En Vattenstämpel är lätt att göra i Silhouette Studio, det kan vara ditt namn i en snygg font eller en logga som du skapat eller köpt. Om du redan har en logga måste du 'kalkera' den i Silhouette Studio, så du får en studio3 fil. När du väl har din design i Silhouette Studio är det dags att göra den vit och transparent. ♦Ett litet Tips! Flytta din logo till den grå delen av arbetsytan, så att du kan se vad du gör, eller följ min instruktion här hur man ändrar den vita arbetsytan ♦ Markera din design Välj Fyllningsfärg Välj den Vita färgen Upprepa ovanstående med 'Linjefärg' så att även linjerna blir vita. Markera din design Åter igen välj Fyllningsfärg Avancerade alternativ Transparent - dra reglaget till höger, 70 - 85% brukar vara bra, elle...

Kassera öppna filer i Silhouette Studio

Bild
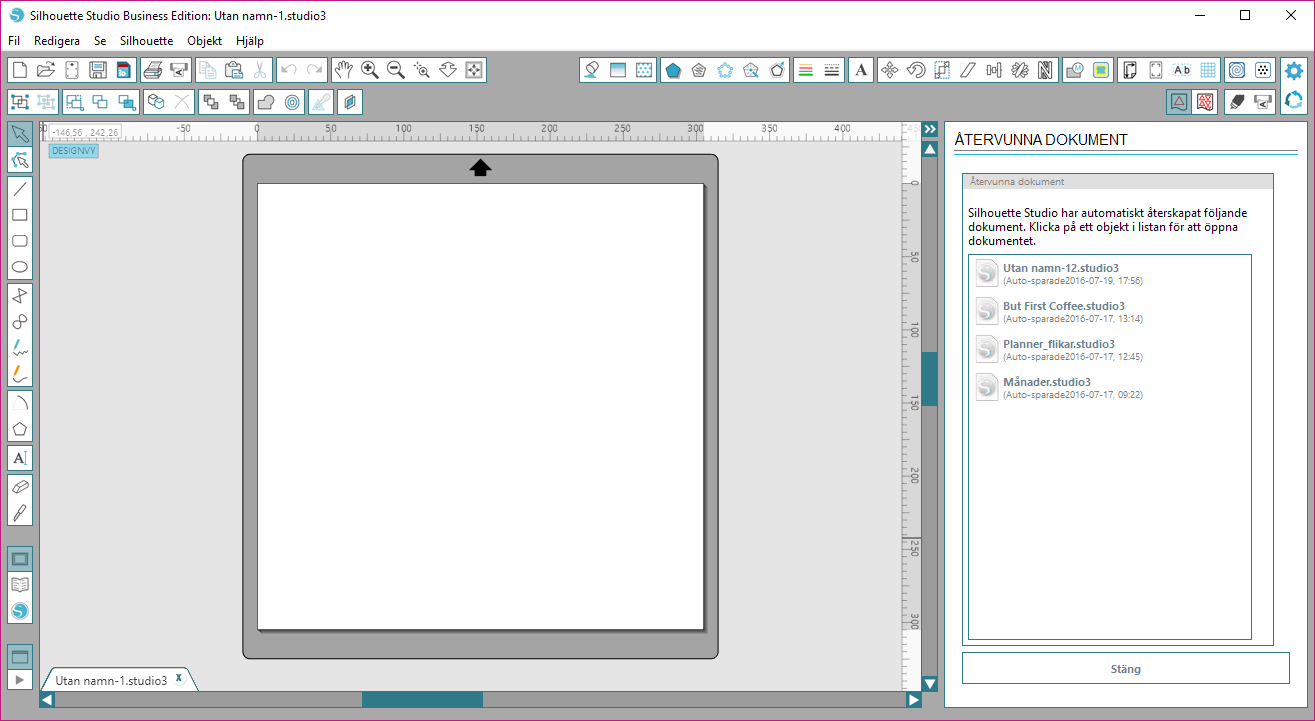
I den här videon visar jag hur man "Kasserar" bakomliggande filer, som bara tar upp plats och kan störa ditt arbete i Silhouette Studio, eller när du ska skära ut med din Cameo/Curio/Porträtt. Efter att jag gjort videon fick jag tillfälle (om man nu kan kalla det för det) att stänga ner mitt Silhouette Studio, som hade hängt sig... Så jag tog en bild på hur "Återvunna  Dokument" ser ut när det finns öppna filer där.

Silhouette Cameo 3 släpps i Augusti 2016

Bild
Hej på er, WOW vilken häftigt höst det ska bli!! Cameo 3 släpps och även version 4 av Silhouette Studio. Jag åker till USA på ett Silhouette Instruktörs Event i slutet av september och där kommer vi att använda ovanstående. Så här ser den ut  CAMEO 3! Här nedan finns lite bilder på en del av de nyheter som Silhouette America släpper till hösten. Så jag hoppas verkligen att de återförsäljare vi har här i Sverige kommer att ladda sina lager. Puh! Det var bara en del av det som lanseras!  Och en ny version av mjukvaran - Silhouette Studio 4 -  Denna nya programvara stöder inte bara nya Cameo 3, men den har en hel del nya, uppdaterade funktioner också. Det kommer att vara en gratis uppdatering (som alla uppdateringar är), och kommer att fungera med alla Cameo modeller (även om vissa funktioner endast kommer att gälla för Cameo 3).  Här är några av de nya programfunktioner : Enklare gränssnitt Lättare ...

How-to use Digital pattern in Silhouette Studio.

Bild
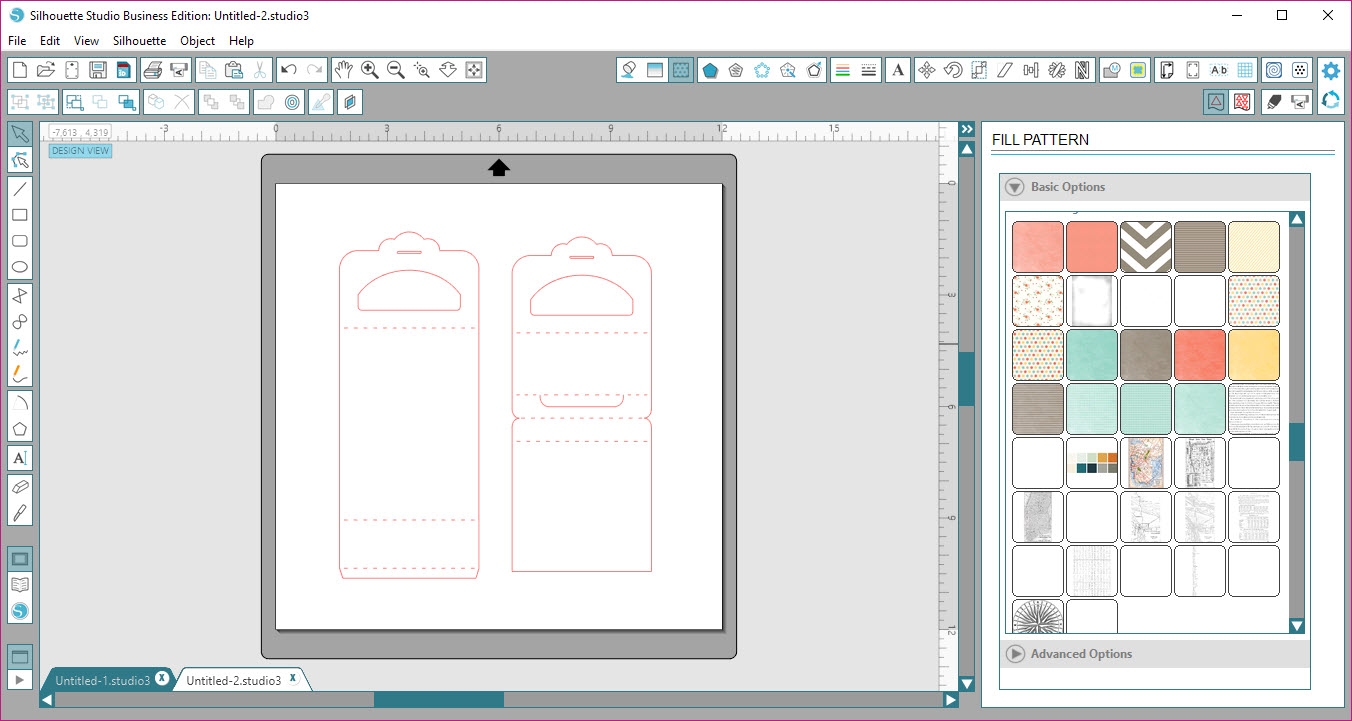
Hi there, Wow know we are in March, and here in Sweden spring is in the air! For me springtime is the most beautiful season of the year, all the flowers and trees flaunts, just love love love it! Today I'm going to show how-to use a Digital pattern from my library in Silhouette Studio. If you have or are going to buy a digital pattern outside Silhouette Store, be sure that you have the Silhouette Designer Edition. I started to download a cute Easter Candy Bag that I bought from the Silhouette Store last year, the designer is Jodi G Warner . To make the bag in a more Easter color follow my tutorial down here Open the Fill Pattern Window at the Top toolbar Be sure that you have marked your design that you would like to fill with the pattern, by just drag over the workarea with your mouse or use the Shortcut key, ctrl+a. Select the pattern that like for this design And if you would like to change any thing in the pattern, select the Advanced Options. Ready ...

How-To make a small card with Silhouette Cameo/Portrait.

Bild
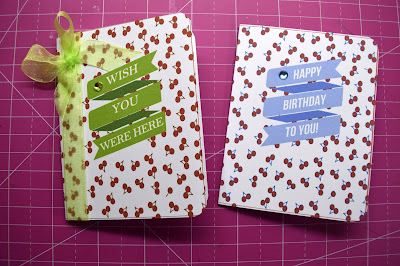
Hi there, and time for a new short tutorial of these small cards. Very handy to give away! I use the cherries above here, that I made a cute paper to use in this tutorial. You can download the cherriepaper here I started my Silhouette Studio, open up the cherriepaper and made a new Rectangle, size H5" x W6", made a scoring/folding line into the middle of the card. Tip!: You can draw a Rounded rectangle, then you don't have to cut the corners later in the tutorial. Downloaded the Banners   and changed the text on it, make a copy and paste it on your small card Remember that you have to design your card like the picture down here, with the cherripaper and the banner to the left side in your rectangle. When you are finished with your design send it to your make it to a Print and Cut by hit "m" on your keyboard. When the paper are dry put it on your cuttingmat to cut it out in your Silhouette cutter. I decorated my small cards and on this ...

Wedding Card

Bild
Hi there, I very beautiful card to make for a wedding! The design is from Daniela Angelova and I bought it in Silhouette Design Store. I decorated the outside with some rhinestones Inside the card a make this text with some swirls that I found in my Sihouette Library and on internet. I found this beautiful gatefold flourish butterfly card that I made to an envelope, in the Silhouette Library, and the designer is Lori Whitlock. I used a lovely lavender paper and that was also perfumed! The Design ID # 76661 I decorated the envelope with some pearls and a white ribbon. Happy Creating;)

3D-Painting as a Wedding Gift

Bild
Hi there, I made this 3D-painting with thoughtful words as a wedding gift, and the couple that got it was very pleased with it, and so was I How to make in Silhouette Studio: I found this lovely phrase in Silhouette Store, and for this purpose it was perfect. I don't have the #ID for it but if you search for "for better of worse" I think you can find it. I adjust the phrase to fit in to my painting/canvas and then cutted it out in my Cameo 1 on vinyl. Stick it to the painting/canvas and then put some Relief Pasta, the brand I used is "Art Collection", on the words as thick as I could. Let it dry and then remove the vinyl, don't forget the small parts inside the letters.  Now it should look like this! I painted everything in black acrylic, I let it dry for  a couple of hours. I colored the words, also with acrylic paint, with with different colors as you can see on the finished result at the top of this short tutorial. H...
How-to Decorate a Paper bag with Silhouette Cameo/Portrait/Curio.

Bild
Hi there, It is so easy to make a dull paper bag into a personal paper gift bag! AFTER BEFORE I used some vinyl for both of thes paper bags. And for the "Made Just for You" I make it like this: I open Silhouette Studio and in the library I found the perfect word for this paper bag, you can buy it from the Design Store or make your own, I don't have the #Id for it but  you can search for "Made Just for You", this is a Samantha Walker design. I modify it to fit my paper bag. First Ungroupe the phrase, Then Mark the first wordfilling Groupe those and do the same with the phrase "Made Just For You". Now you can move them easily. Open the Grid Window and select "Show Grid" adjust the 2 groups, I cut mine in Grey vinyl and for the phrase I use pink vinyl, as you can see on the picture above. I always try to cut out only one time, so I put the grey vinyl at the top and the pink at ...